 This article is not going to teach you how to get a million followers or the most likes on Instagram. Let those “Social Media Gurus” do that.
But, what I’d like to focus on is the actual workflow of getting your photos up to Instagram without a lot of hassle. I can’t deny the fact that Instagram has gotten huge. And I keep hearing about professional photographers getting leads and clients from it. Anywhere I hear that, my ears perk up. After all, what we do here at Flaunt Your Site, SEO (or Inbound marketing) isn’t solely about search engines. The practice involves so much, but the core is really increasing traffic and customers. And as a photographer myself, I totally want more clients, and it sounds like Instagram has potential for that.
So I naturally had some questions about it. The biggest one being about workflow. So I’ll walk you through what I discovered for myself.
How do professional photographers post to Instagram?
I got used to Instagram for a weekend checking it out. Me and my buddy James were doing a guy thing in LA before he moved away to Philly. We ate at Randy’s Donuts, Pinks, Canters, went to see Johhny Ramone’s grave, hung out in Hollywood and Venice. All those photos are still up in my Instagram stream. Click through and you can check em out (and follow me too). They’re heavily filtered and have sloppy borders. I used my iPhone for all that. So I was fairly familiar with the process of using the phone app.
But all my professional photographer friends I know are posting their real photos to Instagram. And all my real photos are inside Lightroom. So my obvious first question is how do I get it from one to the other? I had to come up with a work flow that made sense and didn’t take too much time.
#Latergram to the Rescue
I remember a good buddy of mine, Andy Stenz, using this hashtag on his photos called #latergram. On a whim I decided to check it out. And what I found was really pretty close to what I wanted. Latergram is a website that allows you to directly upload photos to a scheduling calendar. So you can load up a weeks worth, or a months worth (it has a limit of 30 images) of images. You can add your description and hashtags right on the website too!
At the scheduled time, the separate, and required Latergram phone app notifies you. You click on the notification, tell it to launch Instagram (which you also need). The photo is automatically loaded into Instagram!
Then providing you don’t want filters, etc. Click Next, and your description and hashtags are right there already! Score! The next thing is to decide where you want it shared, and then click post. Wham, Bam, Thank you Instagram!
Here’s a visual of me walking through the whole process:
-
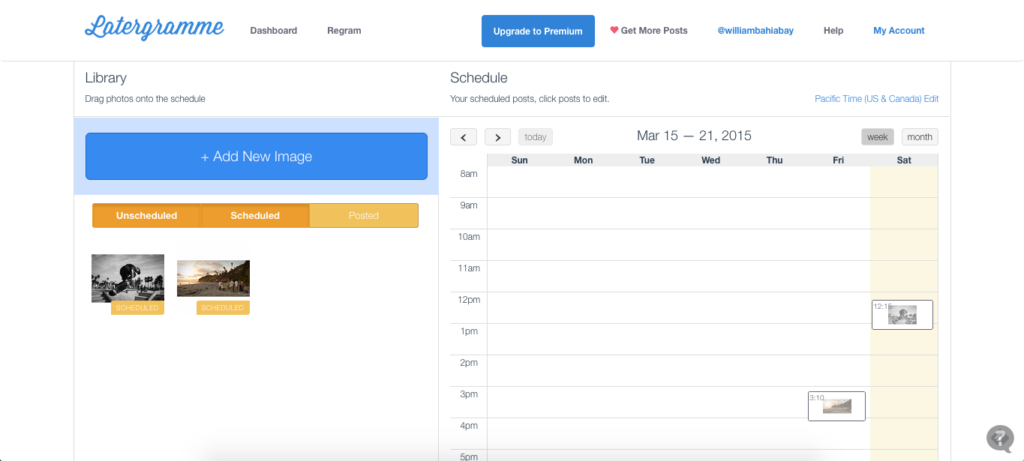
- Easily use Latergram to schedule your photos to Instagram
-
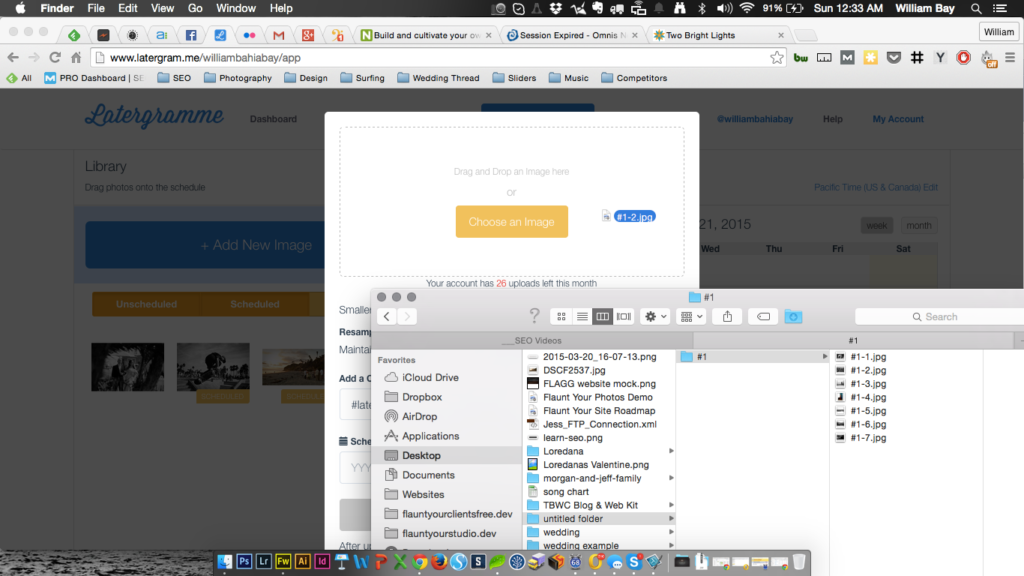
- Just drag and drop each photo in to the New Post window. I do think a batch uploader would be a nice addition though.
-
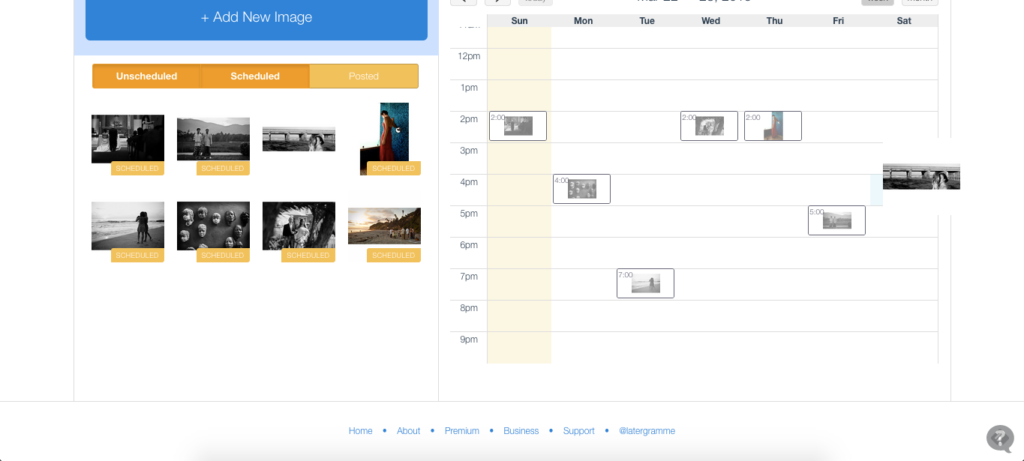
- Then drag your photo thumbnail to the right day and time you want it to release.
So that was easy, but I don’t shoot square.
So, now I got the process of getting my photos into Instagram in a fairly painless way figured out. But I don’t shoot square images. I also don’t want to crop them either since I compose everything in frame. And I shoot panorama formats as well.
The simple solution is to just do what I noticed other photographers doing, and that’s to have a white square canvas, and drop the photo in the center. This leaves white bands across the top and bottom (for horizontal images).
So I started doing that in Photoshop, and after a couple images, I thought it would be prudent to make an Action to automat everything… And that’s when the lightbulb went off (well, maybe after I got a fresh beer).
Orange Mocha Frapu… The Lightroom Print Module!
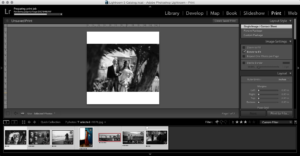 After that beer, I thought… Why not avoid Photoshop altogether and just use the Print Module to export JPEGs? So I set out to figure that out.
Here are the settings I came up with:
- Single Image/Contact Sheet
- Zero margins all sides
- 1 column, 1 row
- Cell Size: 12.8×12.8 inches (you’ll have to set this in Custom Size further down)
- Print to: JPEG File
- File resolution: 100dpi (this creates an image 1280×1280 which is twice the 640×640 size that instagram uses. I just use it cause I can, and I like to think that the data may still be there if they go to a larger size down the line. You can of course use 6.4 inches @ 100dpi if you prefer.).
- Print Sharpening: Low, Glossy
- JPEG Quality: 90 (Instagram probably compresses as well, so I don’t apply much)
- Custom File Dimensions: See above.
That’s it! But don’t feel like you have to stop there. You can add your logo, or different color backgrounds, etc.
So what I do is look for photos I’d like to post that week. I personally do weddings, fine art, travel and Day in the Life family portrait work, so I like to mix it up a bit to show off what I do. I’ll grab a couple of each, and drop them into a Quick Collection. When I’ve got my seven for the week, I’ll go to the Quick Collection, then select the Print Module, select the preset I made, select the seven images, then Print them (it’ll look like your printing 1 image, but it will print all of them to the place you designate.
So now you have your images ready to drop into Latergram as we did in the first half of the post.
Eventually…
…we’ll be able to mentally beam the photos with our minds as we’re driving our self-flying cars. But until then, let me know what you think of the workflow. If you have any suggestions for a better way, feel free to leave them in the comments down below.